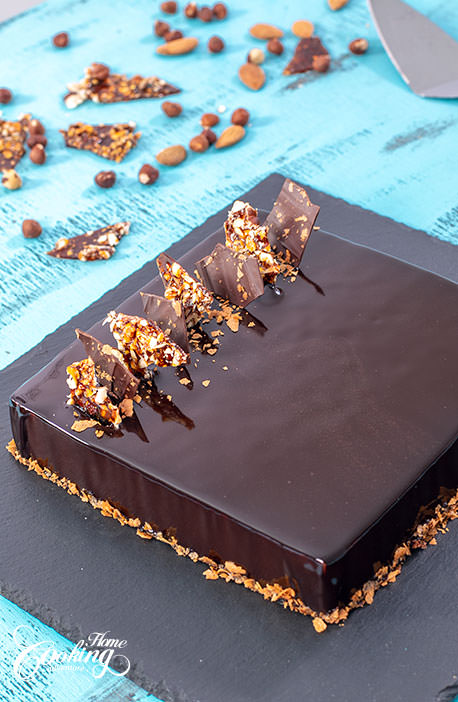
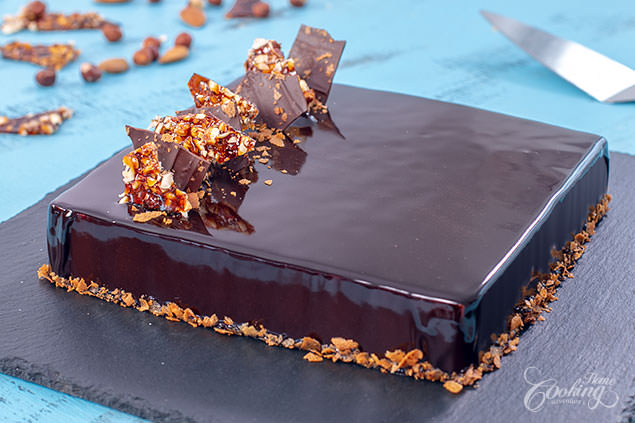
As a chocolate lover, I simply fell in love with this elegant French dessert called Chocolate Royal or Trianon.
This Chocolate Royal – Trianon consists of a hazelnut and almond dacquoise topped with a crunchy praline, covered in chocolate mousse and finished with a glossy cocoa mirror glaze. What’s not to love about this dessert? It’s surprisingly easy to prepare at home, with an impressive appearance and exceptional flavor.

YOU MAY ALSO LIKE:
Walnut Caramel Mirror Cake
Strawberry Chocolate Mirror Cake
Orange Chocolate Mousse Domes

Chocolate Royal - Trianon
Ingredients
Almond and hazelnut dacquoise
- 1/3 cup (35g) ground hazelnuts
- 1/3 cup (35g) ground almonds
- 1/2 cup (60g) powdered sugar
- 2 large egg whites (about 70g)
- 2 tbsp (30g) sugar
- 1 ½ tbsp (12g) cornstarch
- 1/4 tsp (1g) salt
For Praline Paste
- 1/2 cup (50g) whole hazelnuts
- 1/2 cup (50g) whole almonds
- 1/3 cup (70g) sugar
- 1 tbsp (15ml) water
- 1/4 tsp (1g) salt
For crunch
- 1 cup (80g) Paillete Feuilletine or corn flakes
- 1.5 oz (45g) milk chocolate , melted
Chocolate Mousse
- 10 oz (300g) semi-sweet chocolate
- 1 cup (240g) whipping cream
- 1/2 tbsp (5g) gelatin powder
- 2 tbsp (30ml) cold water
- 1 ⅓ cup (320g) whipping cream (35% fat) , chilled
Cocoa mirror glaze
- 1 tbsp +1/2 tsp (12g) gelatin powder
- 1/4 cup (60 ml) water
- 1 cup (200g) sugar
- 1/2 cup (60g) cocoa powder
- 1/2 cup (120g) whipping cream
- 1/3 cup (80ml) water
Chocolate shards , optional
- 1.5 oz (45g) semisweet chocolate
- 0.5 oz (15g) semisweet chocolate , for tempering
Caramel Shards
- 1/4 cup (25g) hazelnuts/almonds , toasted if desired and chopped
- 1/4 cup (50g) sugar
- 1 tbsp (15ml) water
Instructions
Prepare the almond and hazelnut dacquoise.
- Preheat oven to 400F (200C) and line a baking sheet with parchment paper. I’ve used a 12-inch (30cm) round sheet.
- In a food processor blend ground almonds and hazelnuts with powdered sugar and cornstarch until well combined.
- In a medium bowl whip whites with salt until foamy. Gradually add sugar and continue whipping until stiff peaks form. Gently incorporate the almond mixture.
- Spread batter into the prepared pan.
- Bake for 12 minutes until golden. Let cool completely.
Prepare the Praline crunch.
- First prepare Praline Paste. Preheat oven to 300F (150C).
- Place the nuts on a baking sheet and let them toast for 15 minutes.
- Transfer the toasted nuts onto a clean kitchen towel and rub the nuts to remove as much skin as possible. Let them cool.
- In a small saucepan heat sugar and water over medium-high heat until turns golden brown. Stir in nuts to coat with the caramel and transfer the praline to a baking sheet to cool completely. Break the praline into smaller pieces.
- Grind in a food processor until it gets into a thick paste, for about 10 minutes.
- Transfer the praline paste into a bowl and stir in melted milk chocolate. In the end add paillete feuilletine and stir to combine.
- Cut the almond and hazelnut dacquoise into a 7-inch (18 cm) square. Spread the praline crunch on top of it. Freeze until you prepare the chocolate mousse.
Prepare the chocolate mousse.
- In a heat proof bowl add the semi-sweet chocolate and 1 cup (240g) whipping cream. Place the bowl over a saucepan with simmering water, over low heat, until all the chocolate is melted.
- Meanwhile dissolve gelatin in cold water and let it swell for about 5 to 10 minutes. Dissolve gelatin over low heat, pour over the melted chocolate and stir to combine. Let the chocolate mixture cool completely at room temperature.
- Whip the remaining 1 1/3 cup (320g) chilled whipping cream until soft peaks form. Add melted chocolate mixture and mix until well combined. Transfer mousse into a piping bag fitted with a large plain tip.
Assemble the cake.
- Use an 8-inch ( 20 cm) square ring or a mold like the one I’ve used from Delicake. Line with an acetate sheet for easier removal.
- Place the frozen dacquoise into the middle of the ring with crunchy praline on top. Pipe the chocolate mousse on sides and top. Smooth the top. Freeze for a couple of hours or overnight.
Prepare the cocoa mirror glaze.
- Dissolve gelatin in ¼ cup (60ml) cold water and let it swell for about 5 to 10 minutes.
- In a medium saucepan add sugar and cocoa powder. Stir to combine. Add 1/3 cup (80ml) water and whipping cream, stir slightly to combine and place over medium heat. Bring to a boil and remove from heat.
- Add bloomed gelatin into the hot cocoa mixture and stir until completely dissolved.
- Sieve the glaze to remove any air bubbles and let cool to 95F (35C) before pouring over the frozen cake.
- Take the cake out of the freezer and use a hair dryer to defrost slightly the edges. Remove the cake from the ring and place it over a rack or simply on a bowl placed over a parchment paper lined baking sheet to collect the excess.
- Pour the glaze on top and edges of the cake. Use an offset spatula to remove the drips and decorate the bottom of the cake with paillete feuilletine. Transfer the cake to a serving platter and refrigerate for 1-2 hours to defrost the cake and set the glaze.
Meanwhile, prepare the chocolate shards.
- Melt 1.5 oz (45g) semisweet chocolate over bain-marie. Remove from heat and add remaining chopped semisweet chocolate for tempering. Stir until melted.
- Spread chocolate evenly into a thin layer on a parchment paper lined baking sheet. Sprinkle paillete feuilletine on top if desired and refrigerate until set. Break into shards and keep refrigerated until ready to use.
Prepare the caramel shards.
- Spread chopped hazelnuts/almonds on a parchment paper lined baking sheet.
- Place water and sugar into a small saucepan and cook over medium heat until sugar dissolves and gets a caramel dark color.
- Pour the caramel over the chopped nuts and let it set. Break into shards and keep refrigerated until ready to use.
- Decorate the cake with chocolate and caramel shards and enjoy! Keep leftovers refrigerated.
Video
Nutrition
Did you make this recipe?
Please let me know how it turned out for you! Leave a comment below and tag @homecookingadventure on Instagram and hashtag it #homecookingadventure.


Well done!
You are an amazing culinary!
Greeting! Maria, Bulgaria, Sofia
Holy crow! I must make this soon. It is beautiful.
Gorgeous..awesome recipe..Pleased to follow you on Facebook..Twitter..instagram…but failed to follow you on your Mail because the Button is not responding..
Hi you are amazing!!!I have a question where you got it the square pan?
if i want to make white chocolate mirror instead of coco one
what shout i do?
Hi,
where can I found the square ring?
no words to describe…
This cake is my boyfriends favorite from our local French bakery. Finally tackled making it on my own using this recipe today. Turned out amazing!! Thank you!
Hello, can I make this in a 9″ inch round instead of a square? Just made your walnut cake and it came out okay, the flavors weren’t too strong.
this might work better in an 8 inch round pan … to adjust for a 9 inch simply use the rule of three in maths to get the right amount for each ingredient
Hello! I love your mousse cake recipes, but noticed you sometimes use different mirror glazes for them; some use mirror glazes based on condensed milk and real chocolate bars, while others use cocoa powder and heavy cream. Why do you choose one type over another in different recipes? Is there one you prefer over the other?
Thanks for the recipe, I’ve made this cake for my mother-in-law’s 80th birthday, and it was an absolute showstopper!
Things seem so easy on your videos, and if I don’t overthink the procedure, they are! Now I’m preparing a wedding cake!
Wish me luck! Thanks
So happy Eva that your cake turned well 🙂 Yes.. each step is easy to prepare, just to get used with the process.
Wish your mother-in-law many more happy years:) Best, Ella
Thank you so much for sharing and I love the step by step video tutorial! I like to see the steps visually and the beauty of the video, I could hit the ‘pause’ button 😉. Everyone was impressed and absolutely loved it! Thanks again.
Hi – excited to give this a try! Any thoughts on if a spring form pan would work instead of the mold?
Sure.. a springform pan will work good too. you can line it with acetate sheet if desired.
Hi Ella. For how long can we freeze the cake before we add the mirror glaze on top. Many thx
You can freeze a cake for up to 2–3 months before adding the mirror glaze. Make sure it’s wrapped tightly in plastic wrap and stored in an airtight container or freezer-safe bag to prevent freezer burn. When you’re ready to glaze, remove the cake from the freezer and let it sit for 5–10 minutes so it’s slightly softened but still very cold. This temperature difference will help the mirror glaze set beautifully when poured.