Today, I’m excited to share an amazing Blackberry Yogurt Ice Cream recipe with you. While walking through our local market, I stumbled upon some large, fresh blackberries. I couldn’t resist buying them, even though I wasn’t sure what to make at that moment. I debated between a blackberry tart and blackberry yogurt ice cream, but the hot weather made the decision easy—a healthy blackberry ice cream sounded perfect.
To create a marbled effect, I prepared the blackberries separately from the yogurt. Although I didn’t use an ice cream maker, the result was both delicious and refreshing.
How to make Blackberry Swirl Yogurt Ice Cream
Begin with placing a cheesecloth over a sieve and set the sieve over a bowl. Pour the yogurt into the prepared sieve and refrigerate for about 3 to 4 hours to drain. This will result in thick, creamy yogurt.
While the yogurt is draining, prepare the blackberry sauce. In a saucepan over medium-low heat, combine the blackberries and 1/4 cup of honey. Cook, stirring occasionally, for about 7 minutes until the berries start to release their juices. Add the vanilla extract, remove the pan from the heat, and gently crush the berries, leaving some intact for texture. Set the sauce aside and let it chill to room temperature.
Next, after the yogurt has drained, transfer the strained yogurt (about 2 cups) to a blender. Add 1/4 cup of honey, and if using, add the vanilla and almond extracts. Blend until smooth. Pour the yogurt mixture into a covered storage container and place it in the freezer. After half an hour, stir the mixture to break up any ice crystals. Repeat stirring every 30 minutes for two or three more times, or until it reaches the desired consistency.
Meanwhile, strain the blackberry mixture through a fine-mesh strainer set over a medium bowl. Reserve the juice for another use, and set aside the strained berries.
How to create the swirl effect
When the yogurt is halfway through the freezing process, fold in the strained berries using a spatula. Create a marble effect by gently stirring, being careful not to overmix.
Freeze the mixture for about 2 hours before serving, or let it freeze overnight. If frozen solid, allow the frozen yogurt to sit at room temperature for 15 minutes before serving.
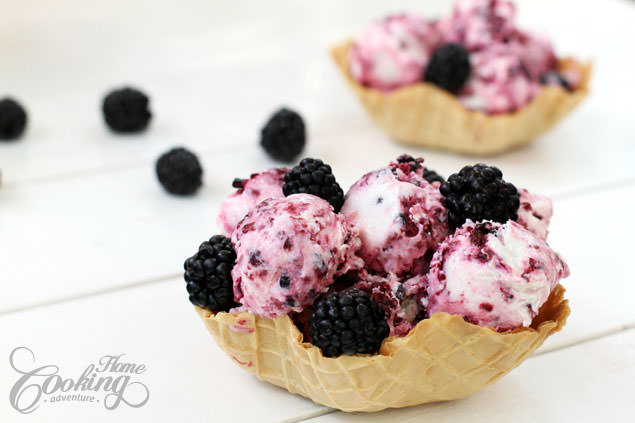
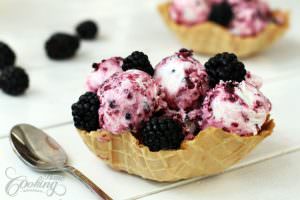
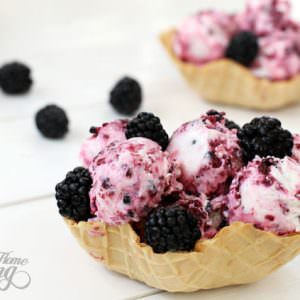
Serve the marbled blackberry frozen yogurt in bowls or waffle cones, and sprinkle with fresh blackberries for garnish.
Hope you will try this easy recipe for Blackberry Yogurt Ice Cream and enjoy! If you do, make sure to share the photos with me on Instagram. Would love to see how it turns out for you.
For more frozen treats check our full collection of Frozen Desserts.
Cherry Semifreddo
Blueberry and Strawberry Yogurt Ice Cream
Tiramisu Ice Cream
Raw-Vegan Neapolitan Cake
Blueberry and Mango Parfait
Nutella Ice Cream
Strawberry Condensed Milk Ice Cream
Apricot Ice Cream
Melon Ice Cream
Mango Coconut Ice Cream
Blackberry Swirl Yogurt Ice Cream
Ingredients
- 900 g plain yogurt
- 1/4 cup honey
- 1 tsp vanilla extract
- 1/4 tsp almond extract , optional
Blackberry Mixture
- 2 cups fresh blackberries , rinsed
- 1/4 cup honey
- 1 tsp vanilla extract
Instructions
- Place a cheesecloth over a sieve. Put the sieve over a bowl, pour the yogurt in the prepared sieve and refrigerate for about 3 to 4 hours to drain.
- Place the blackberries and 1/4 cup of the honey in a saucepan over medium-low heat. Cook, stirring occasionally for about 7 minutes. Add vanilla extract, remove the pan from the heat, and crush the berries gently keeping some of them intact. Set aside and let the sauce chill at room temperature.
- Put the strained yogurt (about 2 cups) in the bowl of the blender, add 1/4 cup honey, vanilla and almond extracts if used, and blend until smooth. Pour the yogurt mixture into a covered storage container and place in the freezer. After half an hour stir again to break up the ice crystals. Stir every 30 minutes for two or three times more or until it reaches the desired consistency.
- Meanwhile strain the blackberry mixture through a fine-mesh strainer set over a medium bowl. Keep the juice for another use. Set the strained berries aside.
- When the yogurt is halfway through the freezing process fold in the strained berries with a spatula creating the marble effect, being careful not to overmix.
- Freeze for about 2 hours before serving or let it overnight. Allow the frozen yogurt to sit at room temperature for 15 minutes before serving if frozen solid.
- Serve in bowl or waffle cones and sprinkle with fresh blackberries.
Nutrition
Did you make this recipe?
Please let me know how it turned out for you! Leave a comment below and tag @homecookingadventure on Instagram and hashtag it #homecookingadventure.
that looks so incredibly beautiful!!
Thank you, appreciate your comment.
i love your pics and this sounds good!
thank you , it sounds and tasted good too.
Ella did you mean by 2 cups of Greek yogurt
For the yogurt can we use plain greek yogurt so we don’t have to strain it? Thank you and I love your recipes!
can we use 2% greek yogurt instead of low fat yogurt?
Hi Jessica, of course you can:)
Thank you
If I were to use strained greek yogurt, how much would I use?
Thanks